Custom MagicBand Holder
Table of Contents
Introduction
Magicbands are... unweidly. They're inherently designed as a one size (or two, if you remove the grey outer band) fits all solution for guests of all shapes, sizes, and ages to wear while being thrown about on intense attractions, alongside the typical wear-and-tear that come from everyday park attendance.
Disney does (or did, depending on when you're reading this) their best to try and spruce them up with fun designs, quirky character art, and even some special materials sometimes. Depite all this, it's still the same frankly uncomfortable band made of a plastic/rubber that somehow feels even worse in the delightful florida heat.
What is really cool about hem, however, is the "icon." That's the removable plastic puck in the center of the band that actually contains all the magic of the band - an RFID chip, antenna, even a tiny battery for BLE (bluetooth low-energy) communication.
(As an aside, that BLE battery/chip is what's used for detecting your magicband's presence over long-range. Any sign which displays your name in the park, or the automatic system which links photos to your disney account, those all rely on that system to function. This is why you'll see those functions fail in older "icons" - the battery has run out, and there's no way to charge it)
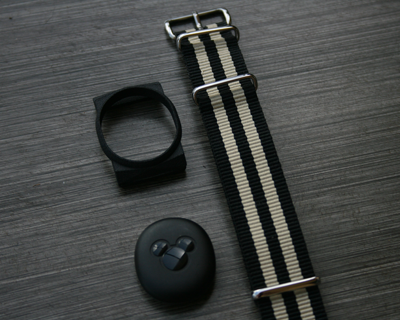
With my attendance at UCF upcoming (Started August 2018), I decided to make myself a nicely-decorated alternative, using some of the knowledge of watchbands I learned from customizing my Pebbles with NATO watchstraps. All I needed was an adapter.
CAD is hard.
I decided I was going to 3D-print the adapter. I'd worked with Shapeways before (a 3D-printing service based out of New York with some seriously high-quality machines), and I wanted this piece - which was going to have some funky shapes and curves - to have that high quality and durability I've come to expect from them.
The only problem was actually making the design.
I started off by taking some rough estimates of a magic-band icon. Rough being the key word here - I had no prior experience digitizing parts, let alone curved ones. From there, I created an equivalent icon in Blender, and attempted to sculpt out the shape to prepare it for printing.
My first design was... flawed. So much so that I don't even have the model anymore.
I couldn't figure out a way to properly carve what I wanted that would fit the magicband icon. I just wasn't skilled enough at the time in 3D modeling or CAD work - I still can't do that.
Luckily, adapters for the Icons are... somewhat common online. I found one model available for free on thingiverse for use with a keychain. Taking that model and stripping out the keychain nub was easy, repairing the surface? A little less so. Once I did accomplish it, however, it was a simple matter to strap on some loops to the bottom of it with some supporting geometry and call it done. The real challenge is testing.
I need a 3D printer.
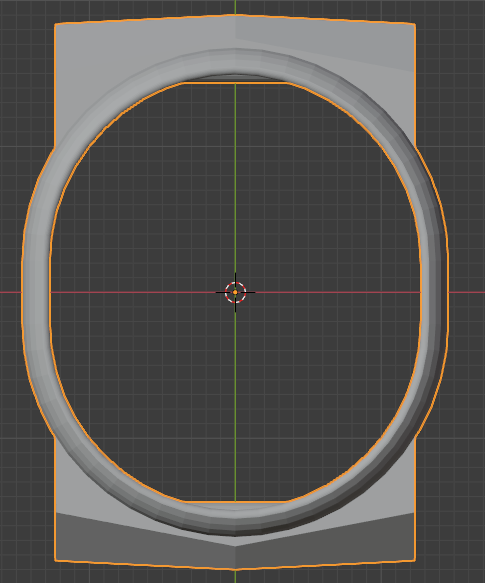
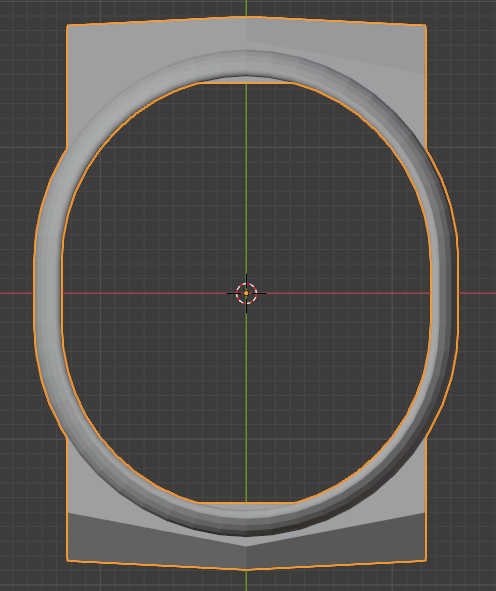
I don't have one. I never did. So the actual test-and-adjust period for this took the most time out of the entire project. I'd make a tweak, order the part, and in about 5-6 days time it'd be at my doorstep. I'd do a test fit, go through and open up the model in Blender again, and make the changes. After about three goes, I was satisfied. Below is versions 1, 2, and 3, all in a row. You can see how little changed from model to model, with most of the changes being simple scaling of the ring in x/y directions.

Once it arrived, however... pretty.
The Glamour Shots
.JPG)
.JPG)
.JPG)
.JPG)
.JPG)
Closing Notes
I still wear this thing every time I go to WDW. It's just.. so convenient. It doesn't stick to my skin when it's hot, it's lighter, it's convenient to take on and off by yourself - it's nice.
The watch strap pictured in the shots above is from a company called NATO STRAP CO. The specific product itself isn't offered anymore, but the holder is compatible with any 20mm watchband.
In addition, you can actually buy the adapter for yourself, if you'd like.
I mentioned making it with a UCF theme earlier - the plan was to make something to cover the mickey icon in the middle as well. I went with a local sign company to print vinyl stickers with the UCF pegasus on them. However, the transparent vinyl stickers just didn't show up all that well on the bands, so I ditched that concept.
On the bright side, I now have a bunch of UCF pegasus stickers.