Breakout for the MSP430
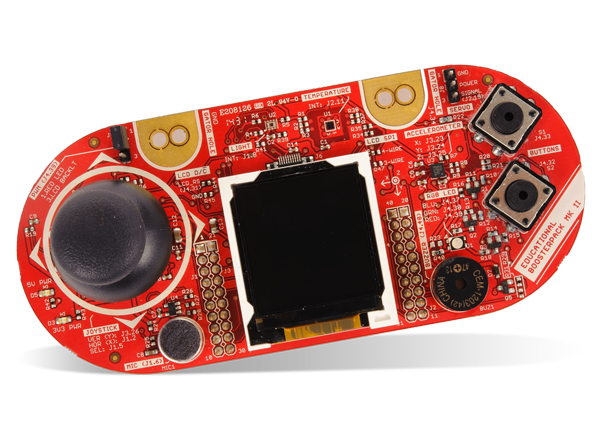
During the Spring of 2021, I took a required course for my CpE degree called "Embedded Systems" - a continuation of our education in low-level computing, the course covered software development on Texas Instruments' MSP430 microcontroller, on an educational "Launchpad" development board. In addition, we made use of this "Educational Booster Pak MkII," which added a color LCD screen, analog joystick, and clickier buttons to the device.
I got pretty confident with myself over the course of the semester, and by the time I'd finished all relevant programming assignemnts with the board, I wanted to do a new project from scratch: Implementing a game on the device.
Understanding the limitations of myself and the device, my brain quickly went to one of the simplest games that I've put a bit of time into before: Atari's breakout. I'd create a version of the game for this device, all written in C, (almost) all from scratch - this is low-level embedded programming after all. A graphics library was provided by Texas Instruments, which I was very, very thankful for.
Oh, and I'd do it in an afternoon.
So. Let's start.
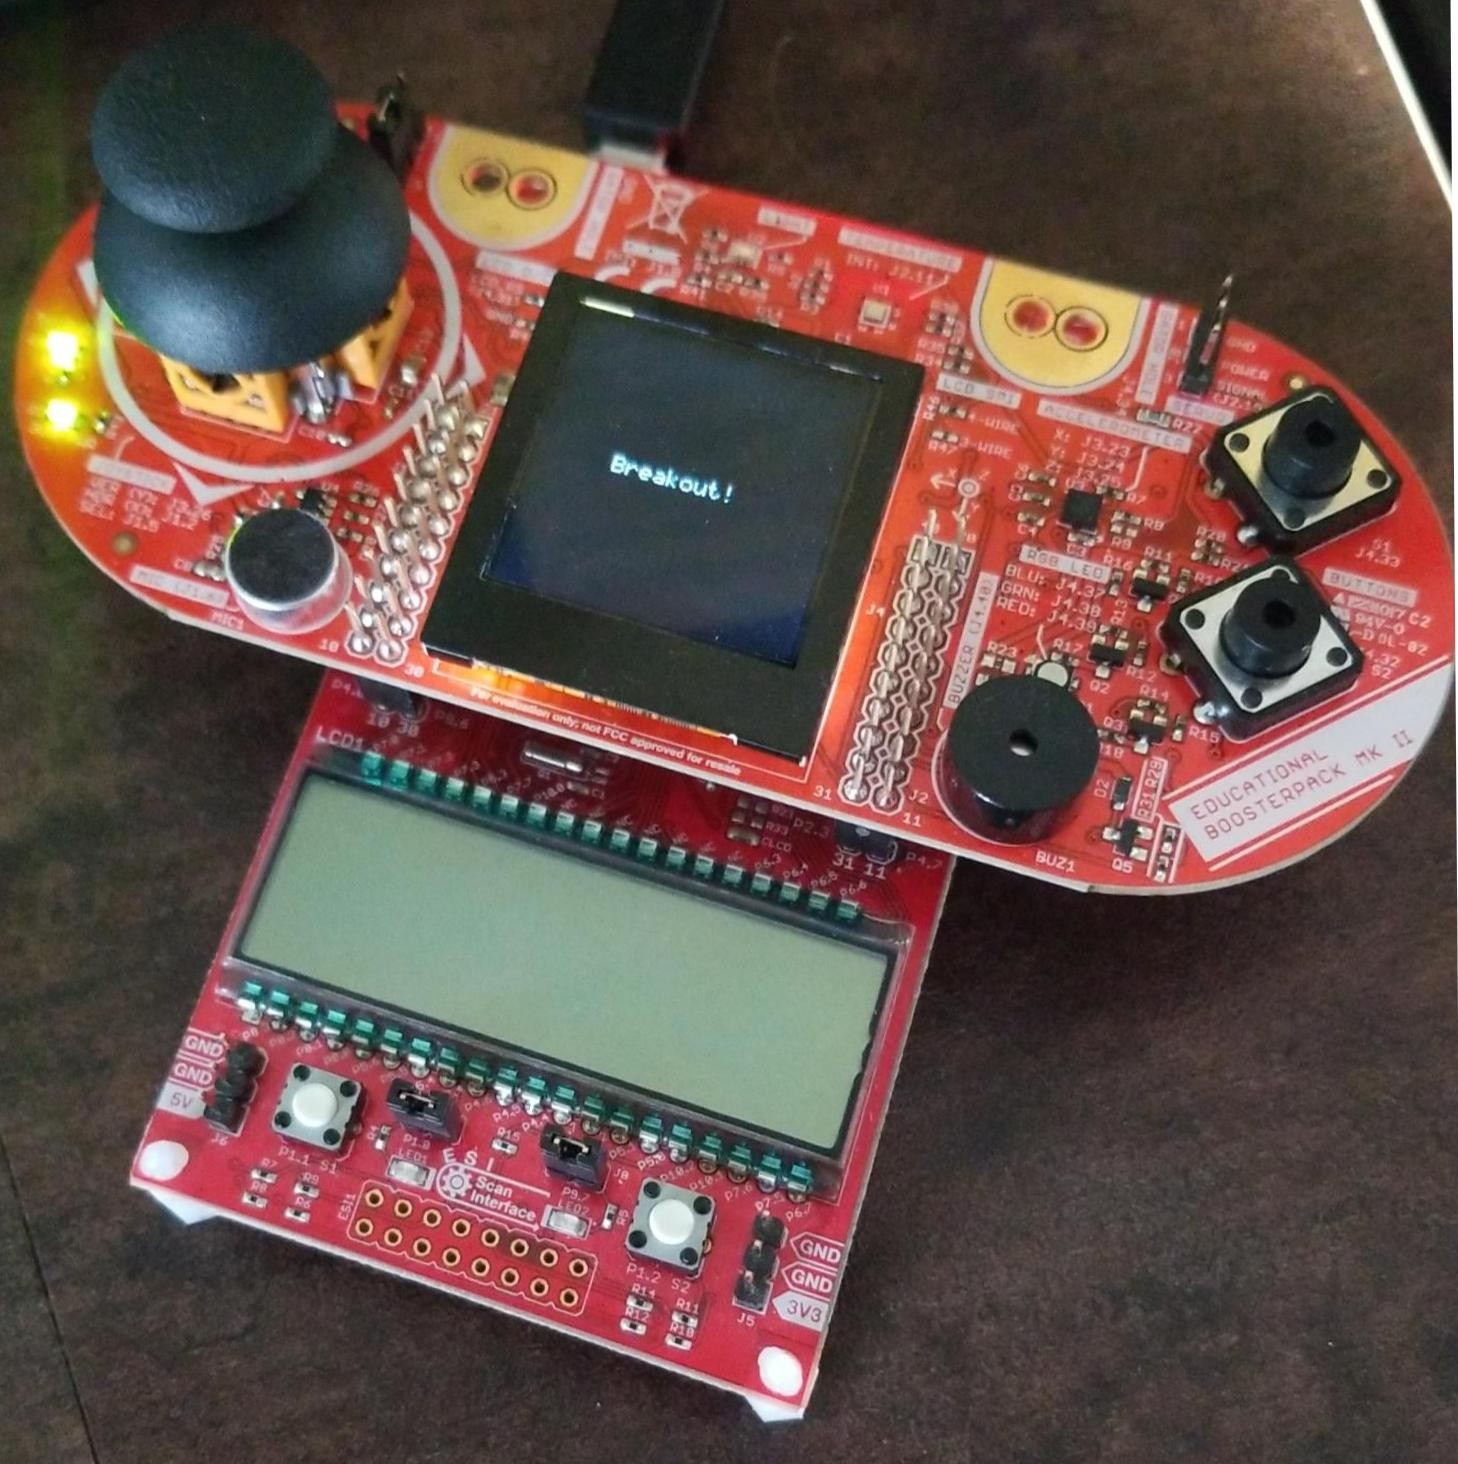
The very simple example provided by the lab only included displaying some basic text on the screen. A slight change gave me my hello world example - just a little fun text display. But let's get down to business. What does this software have to do?
It needs to:
- Have a consistent, fixed loop on which to perform graphics/physics updates
- Have basic physics for one object (ball)
- Have user-input driven elements (paddle)
- Have collisions between ball, walls, and paddle
- Keep track of game state and score.
Consistent Loop
To do this, I actually used one of the first things our lab had taught us about - the timer module onboard the MSP430. This is a dedicated module that runs several timers - and timer channels - that are driven by various clock signals. For this lab, I targeted (originally) 60Hz, using the 32kHz crystal connected to the development board. Due to constraints with how fast the display could update, I cut that back down to 30Hz.
To get the loop to do something, I set up an interrupt to trigger every 1/30th of a second. We'd do what we needed to do, reset the interrupt, and then go back to sleep. Tada! Reliable 30Hz updates.
Ball Physics
Simulating physics can be incredibly complicated or incredibly easy, depending on the scope of the project. Naturally, with Breakout, it was incredibly easy. The ball has no friction, no air resistance, and never changes the magnitude of its velocity. It's very simple and easy to implement.
Each iteration of the loop, just move the ball according to the velocity. If the ball is going to fall out of the world (off the screen), reverse the velocity in a way that makes sense (i.e., if hitting the right wall, move left).
Add in a little bit of code that draws the ball each frame after clearing the last frame, and...
Ah.
That's no good.
So, it turns out that the actual "drawing" to the screen part isn't set up the way I thought it was.
To likely save on power, the graphics library I was using would only update a part of the screen at a time - manually drawing pixels one-by-one instead of doing something with a dual-buffer setup (draw to one image while displaying another, then swap them out). So, attempting to clear the screen would draw black to the entire screen in a very visibly slow process. Not good.
I could've gone through and attempted to implement a double-buffer properly, or done some other fiddling around with a "real" solution, but it's a one-day project. It's not pretty.
Instead, I'll be drawing a black circle (the background color) at the current position of the ball, then drawing the white circle (real color) at the ball's new position. This way, the ball is cleaning up after itself before it moves.
Well that's a little unfortunate.
Somewhere along the line, I had transposed the x and y positions between the balls, leaving the white and black balls travelling mirrored to each other along the x/y axis. Neat.
Luckily, it was a simple fix, and I soon got the ball bouncing properly.
Ball physics done!
The Paddle
This was (luckily) another module I'd worked with in our lab already - the analog to digital converter module! The joystick on the booster pack is composed of two potentiometers and one pushbutton (for digital input), and hooking that system up and configuring it properly was something we'd already done that semester. So, using my knowledge of the configuration calculations (absolutely a bit over the top, that thing, but understandably so), I set up a function to get the X value of the joystick.
From there, it was easy to feed in to the system. Drawing a rectangle every frame at a position that matches the joysticks position was the easiest solution. If I wanted to be more accurate, I could've made the user input affect the paddle relatively (i.e., the paddle stays where you leave it when the joystick is centered, move left to shift the paddle left, move right to shift the paddle right). But the direct movement implementation I came up with felt a lot more satisfying and direct.
Now, it needed to collide with the ball.
AABB Collision Implementation
The simplest form of collision you can implement in any game using a cartesian coordinate system is an Axis-Aligned Bounding Box. Basically, boxes that cover the entire important volume of your object you want to check collisions for that doesn't rotate at all. Each face of the box is along the main axes of the space. To do so, you take the two boxes you'd like to check and look at opposing pairs of faces on each box. If one box's face is between another box's pair of faces, then they're colliding.
There's a lot of good resources available online for this if you'd like to read more - Mozilla has a great write-up here, that even goes into spheres and specific implementations. A much more formal write-up of general collision techniques is also found on wikipedia here.
I implemented a version of that system here. My implementation was unfortunately a bit messy - the main goal for me was to not only detect collisions, but also find on what axes the collision had occured. Then, I'd return a four-bit value that could be bit-masked to check for what axes it had occured with. You can find the specific code here on the project's github.
At this point, I became very confused again. I had drawn some rectangles on the screen to test collisions, and they were supposed to change color when the ball was colliding with them (overlapping). But they didn't. In fact, they only did when the ball was in a totally different - but consistent - other part of the space.
It took me far too long that my mistake with drawing the ball and shadow had come back to bite me again - the axes had been flipped. The ball had been drawn mirrored along the x=y line just like I'd done with the shadow, but the collision was not mirrored.
Swapping those variables in drawing fixed that issue.
Now, I could collide with the ball, the paddle, any arbitrary rectangle, and the walls! When the ball hits something, it flips its velocity as required, and then keeps on trucking. Yay!
Breaking of Blocks
The entire point of Breakout is to bounce balls back and forth until you manage to clear the board of bricks. As of yet, there were no bricks. Nor levels.
So, I came up with a little system that I really didn't end up using. Each "blocK" is just a rectangle (as defined by the graphics library) in memory. Four points (x, y, dx, dy). This is stored in array of memory of fixed size (I think I picked 30 blocks). This lets me draw 30 rectangles of any size or position on the level, though I only ended up using a simple grid of rectangles. Spaces in the 30 block array that are unused are filled with "null blocks," or, blocks that have (-1, -1, -1, -1) as the values.
When loading a level, a simple memcpy call copies all the level data into the working array of blocks. The status of the game (have all blocks broken yet) is tracked by an integer, which is loaded with the number of non-null blocks in the level. Each time a block breaks, the number is decremented.
The physics loop now just iterates through the working array, skipping null blocks. The block and ball are checked for collisions. If there is a collision, the block is painted black, the space in the working array is wiped out and replaced with a null block, and the counter of active blocks is decremented.
When the remaining counter is at zero, reset the game.
Tada! A basic little game has come to life.
But there's still no challenge or polish to it.
Lives
What is a game without fear of failure?
As of yet, the ball had no care about falling out of play. In traditional breakout, the bottom boundary of the playspace means death for ball. It's relatively simple to implement on my side - a lives variable, keep track of how many lives were left, and decrement that every time the ball hits the bottom. No more lives, the game resets.
In addition, you typically get to choose the launch position of the ball. After a death, then, we disable physics calculations on the ball (collision, velocity, etc) and pin it to the paddle's coordinates with a fixed offset. When the player hits a button, the ball is freed, and the physics return.
Polish
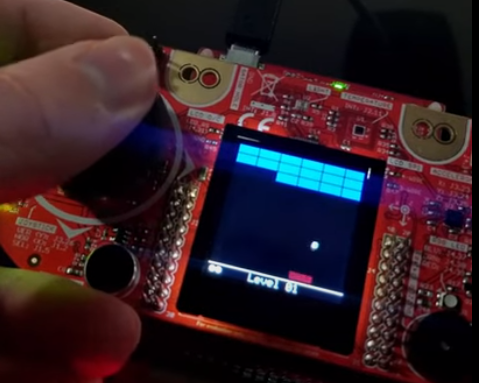
A little user-interface is in order. I shifted the paddle and bottom boundary up by about 20 pixels, to make space for a label that lists the level you're on (though every level is the same in this version) and three balls to represent your lives.
When you die or succeed, a little screen is displayed telling you what happened. "Game Over," "You win!" are shown, with a bit of text showing how many blocks were broken. "Press the button to continue/restart," and the game is done!
Here's a video of the completed project:
I have plans to return to this at some point with a fancy level editor program for windows, but that hasn't happened yet. For now, the source is available here on github: thomasstoeckert/MSPBreakout: A quick project to clone ATARI's Breakout to the MSP430FR6989 w/ Education Booster Pack MKII (github.com)