
The Breakout Editor
My MSP430 Breakout Clone was a quite satisfying little project - creating what was really my first game from scratch on low-powered embedded hardware was a fun challenge, especially with my self-imposed time limit. However, that time limit led to me not including features I really wanted in the end - including multiple, varying levels, as well as more variation in block colors. So, before I finished that, I had already planned this one: A desktop application that let me create and edit levels for the game. The hardest part was actually finding out how to start.
Table of Contents
Technology
I've written a desktop application once or twice before - for the most part, it's been some standard .NET C# / VB program, built using Visual Studio and its WYSIWYG editor for UI layouts. But these have all been simple applications, composed of simple UI elements like labels, buttons, and functionality that doesn't have to be any more complicated than that. For this, I was going to need a proper canvas to draw upon, which meant having some renderer like Win2D or OpenGL.
Unfortunately for me, I really had trouble setting up either of those - I'm sure I could've gotten through the setup process with more learning and struggling, but I was quite frankly frustrated with the hoops one has to jump through to get any kind of libraries associated with a C++ project. So, I fell back to something that I was familiar with - just to be used in a new way.
Flutter.
Previously, I'd used Flutter for LogRide, doing cross-platform mobile development using it. I even started playing with the web environment for Flutter, too, building an internal tool for the LogRide team before handing that off to another developer. But in the mean time, the Flutter team had gone through and somewhat stabilized a new platform for compilation and deployment: Desktop.
I put together the default tutorial application, and, as expected, it was straightforward and easy to understand and build upon. So, I began development.
File I/O
My first priority in development was to establish a file format and a serialization/deserialization process for it. My primary goal for the format was to be plug-and-play with the Breakout source code - open the file, copy the data, paste into a header file, and done. That meant having a format that could be parsed by a C compiler without too much extra work.
The way levels were stored in the Breakout clone were simple - each block is stored as a rectangle, a struct provided by the graphics library composed of an x-min, y-min, x-max and y-max value that were used both for collision calculations and the initial painting of the playfield. My first level was stored in an array that looked something like this:
{{1, 1, 20, 8}, {22, 1, 42, 8}, ..., {110, 40, 127, 48}}
An array of arrays, effectively, but handled as an array of structs. Parsing this was somewhat simple - remove the first and last brackets, split the blocks into their own strings, and parse those into blocks objects.
Saving the file back was even easier - liberal use of the .join() method of strings in flutter was used to assemble the arrays, padded by brackets, and then saved as a string to a file.
After parsing the data, I could render each block as an empty Container widget in an InteractiveViewer, letting me zoom and pan around the level, yielding my first development screenshot: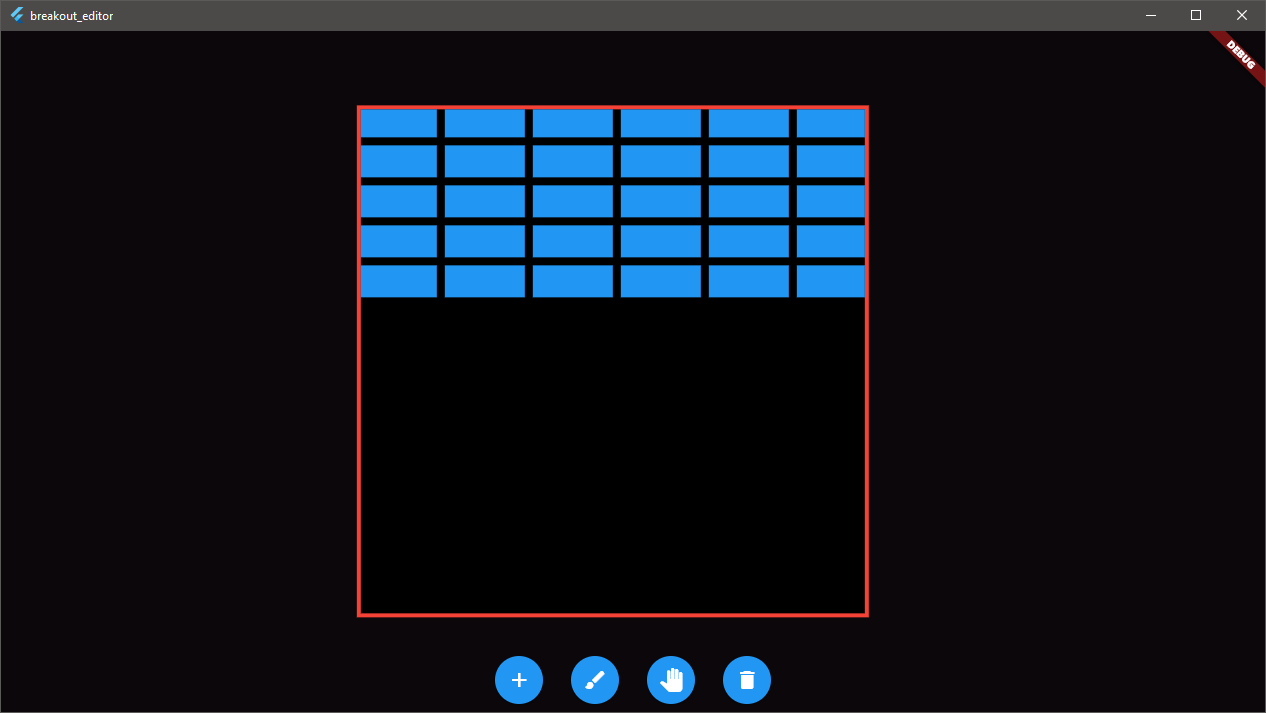
Active Development
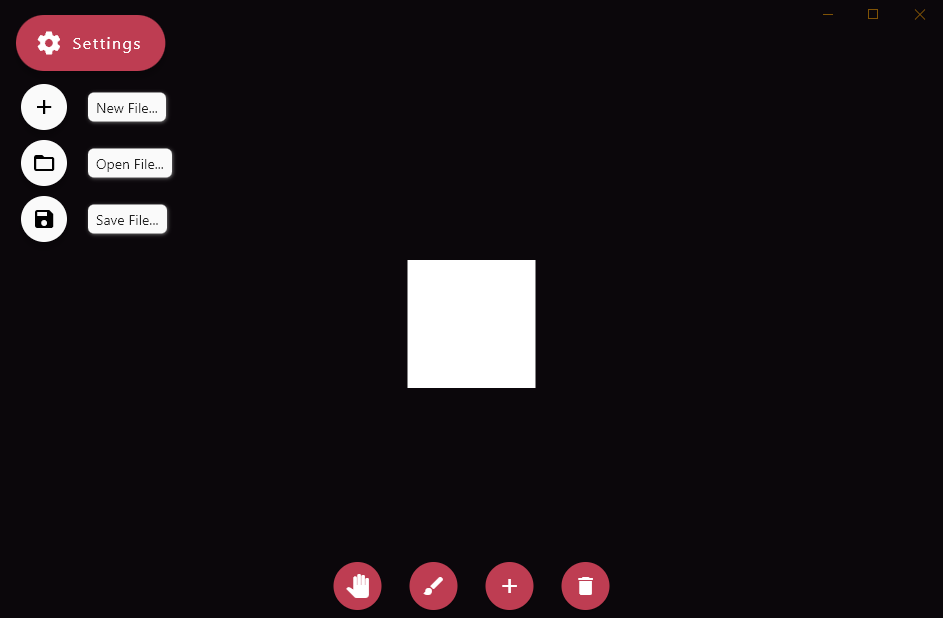
Now with files loading & saving properly (verified by my first real unit tests), I needed to implement some actual interactions with the data we've now parsed. No load/save buttons existed yet, so I looked into my possible solutions for this. The first I found, Flutter's menubar plugin, could technically provide this functionality. But frankly, something about the harsh, sharp menubar that Windows provides just didn't set right with me when using Flutter's advanced UI tools. Luckily, I found bitsdojo_window, a great package that allowed for intuitive control of the window's appearance, and flutter_speed_dial, a package that provides a roll-out floating-action-bar menu, granting me a primary file action menu. A little tweaking, and I ended up with this:
A big improvement. But I wasn't quite satisfied with that infinity-titlebar look - zooming the editor field in completely showed that it actually cut off the part of the field that would sit underneath it, and, in addition, it would block any interaction with the space in that location without any visual feedback.
Another complaint of mine lay in the color palette - it was nice, but very monotonic. Not to mention the constant salmon hue didn't really lay well with me for such a neutral application as this.
I fixed the title bar problem through just making it incredibly blurred, giving it a pseudo-fluid design look, alongside a light grey tint to make it visually distinct from the editorfield. Some tweaks to the shape of the button, a new color palette, and a few slight adjustements yielded the following, final visual style:
You can see at this point that I started to get the block interaction working. For creating new blocks, I would get the relative position of the click on the canvas then place a block of default size in that space. For deleting existing blocks, I'd listen for a click on a specific block, then delete that block from the level.
I even had a click+drag system working. Beginning a click+drag on the canvas spawned a "working" block the program kept track of, and each update of the click+drag added that update's delta to a working offset. That working offset would be used for updating the height+width of the block. The only limitation of this system was that we couldn't go negative in either direction - neither the graphics library for the MSP430 or the widget system I'd built to render blocks could support this. You'd be limited to stretching your block only to the bottom right of where you initially clicked.
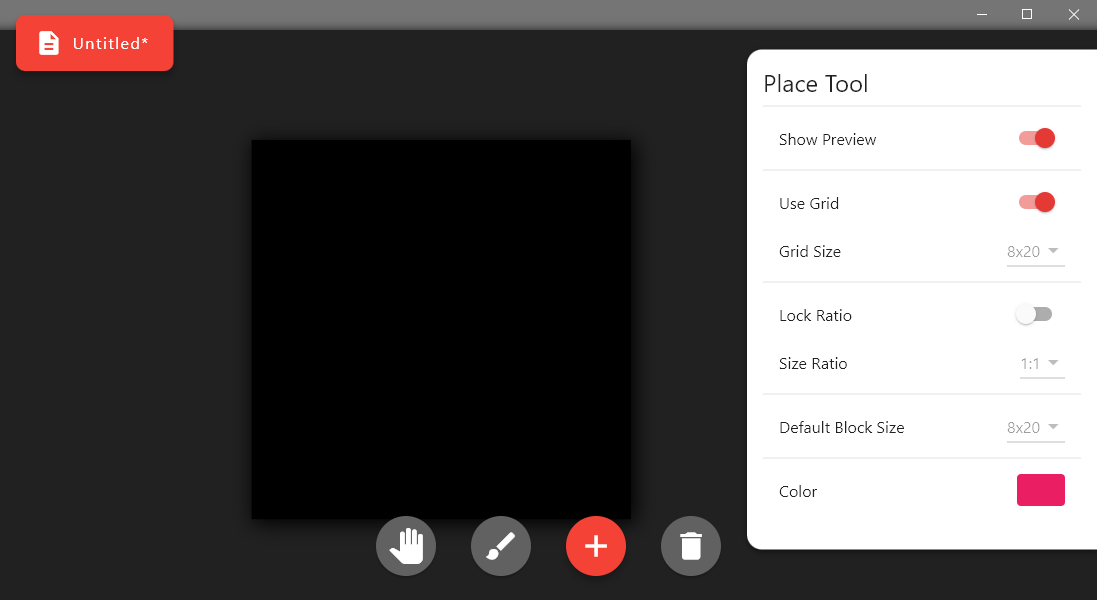
From here, I wanted a bit more customization to the "place" tool - in order to create nice, organized levels, you'd have to go through and very carefully place blocks exactly on the right pixel. Not an easy task. So, I wanted a grid option, I wanted a preview ghost, and a few more settings.
At this point - namely, the implementation of the "preview" block, I began running into issues with the cursor tracking. The background would get the position of the cursor, place a ghost block there, and then draw that block. That block would be in front of the background, as it should be, but that block would then obscure that cursor from the background. The background wouldn't be able to detect the cursor anymore, and, thinking the cursor left the space, delete the block. Now it could see the cursor again.
This would repeat every other frame, causing a bit of a flickering effect to occur. Not good.
I solved this problem by doing cursor interaction the right way - disconnected the "block" rendering from the physical interaction. The widget detecting mouse interaction was moved to the top of the stack, block detection now happened by checking whether the mouse's click location was inside any of the blocks (mathematically), and then the work was done by the proper method. This solved all my problems, and yielded a really great system in the end.
Snapping a block to a grid turned out to be relatively simple, too. In abstract, we have to divide the coordinate by the grid size on that axis, remove the remainder/decimal, and then multiply it again by the grid size. This results in a value that is brought to the nearest point on that grid. In one line, that's
positionX = (positionX ~/ gridSizeX) * gridSizeX;
The other challenging feature of these settings was the implementation of a "fixed ratio" for the click+drag functionality. Limiting the dragging to a 1:1 ratio ends up being incredibly easy - you're always clamped by one axis (height/width), you've just got to figure out which one. When you're constrained to one quadrant of a coordinate space, like we are, this became dead simple: pick the smaller of the two. Mathematically, this is just checking on which side of the x=y line the cursor is on (via less-than).
Once you get into odd ratios, then it gets slightly more weird. It took me a while to figure this out, but the correct way to detect these things with non-trivial ratios is just to rewind my brain to middle school algebra - y=mx, where m is the slope. Then, you can check what side of the line the cursor is located, and then you'd know which axis (x,y) is constraining you.
Color.
From the start, I wanted to add color to this. Most versions of breakout have some variation in their blocks, typically by changing the color of the blocks to mean different functionality (unbreakable, two-hit, powerup, etc.). I didn't want to get that advanced into this, but I did at the very least want to allow a level-creator to paint whatever colors they wanted so the board would be a little more interesting than just a monotonic blue hue.
The first challenge with color goes back to the file format - the "block" data structure itself wasn't conducive to being altered, as I had mentioned already that it was used for collision checking. In addition, we didn't really need color data in the collision checking either, as it's only used during the initial painting of the level. Storing the color for each individual block, too, would be a little wasteful. Inspired by classic image formats, I decided the best bet was to store a "color palette," followed by a list of indices that bound each block to a color in the palette. These three things were stored on separate lines, so the file string could just be split by the \n newline character to get all the data. Easy.
{{0, 8, 16, 16}, {8, 16, 24, 24}, ... {48, 8, 64, 16}}
{0x2196F3, 0x4A0904, 0xEBD300, 0xEEF3BC}
{0, 0, ..., 0, 1, 1, 1, 1, 1, 2, 2, 2, 2, 2, 3}
The next challenge actually came from the color format - Flutter stores colors as 16-byte integers, with the two most significant bytes representing the alpha of the color. As that's not a feature of my editor, those will always be 0xFF. However, the graphics library used in the breakout clone has those two most significant bits as 0x00, always. This means that during the serialization/deserialization process, I just either logically OR the color and 0xFF000000 to ensure full opacity or logically AND the color and 0x00FFFFFF to ensure the MSBs are zero.
I actually got a little worried at this point, as Dart's .toRadixString function actually would omit empty bytes that weren't important. I was naively terrified to see colors like blue represented as 0xFF, or green as 0xFF00. Naturally, these are still valid, and were both parsed properly by both platforms (Flutter & MSPGraphics), but I had to take a moment to remind myself how hexadecimal worked.
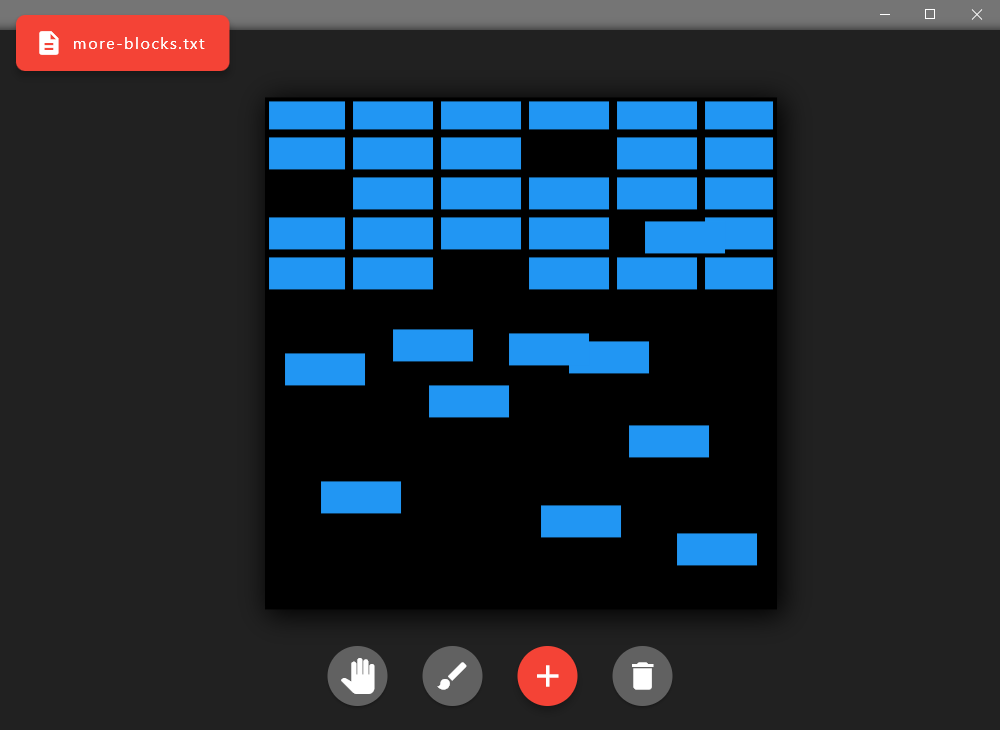
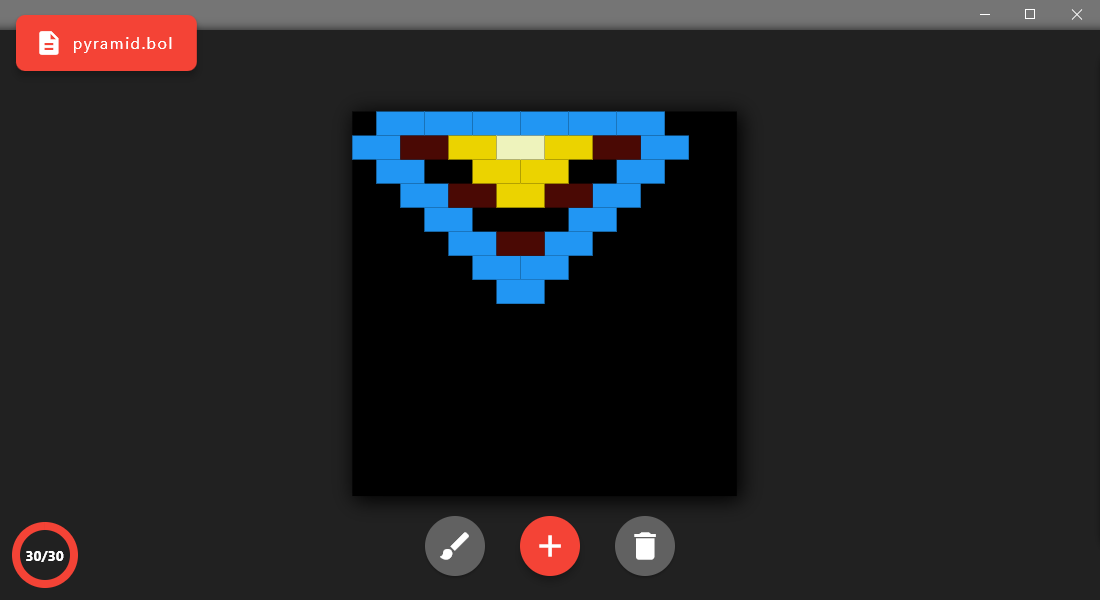
Here's the level listed above, with full color.
The last bit of work was to adjust the C code for the breakout game to accept these color changes - and accept multiple levels. Just a few quick tweaks, and the system was complete.
Video Demonstration
There's an extra step in the video above - the packaging of the levels into a single .h file, and then the compilation of that. In order to make the level files a bit more flexible and simple, I decided that they themselves shouldn't be the entire C source code. Instead, I built a simple dart program that reads a configuration file (levels.toml) in the local directory and assembles all the input files into one big output .h file, pre-formatted and ready to be copy-pasted into the Breakout project. It's simple, fast, and painless.
What more could I do?
If I wanted to expand the scope of the application, it'd be really interesting to just download the levels onto the game, instead of having to recompile the game itself. I could establish a UART communication between the host PC and the MSP430, storing the level data in the MSP's non-volatile memory. This way, you could test and play levels right there, without having to do the two extra steps.
Speaking of that extra step, building-in the "packaging" functionality into a but of UI in the editor would be nice. Some graphical way to add all the levels together, move them around in a list, get previews of each, etc.
Closing Thoughts.
I like what I have now, and it's probably the right amount of effort (if too much) given the frequency I'll use this tool (probably none). If I get really, really bored, and run out of other projects, I could probably take a crack at the level download functionality. But that'd be a very, very big undertaking I really don't want to do right now.
You can view the source for the breakout editor here: thomasstoeckert/breakout_editor (github.com)
You can view the source for the breakout packager here: thomasstoeckert/breakout-packager (github.com)
There are binaries available for both programs (Windows, x64) on their respective releases pages on GitHub.